Inertia and procrastination have kept me from posting here for a while now, but I plan to fix that this month. I’ve always wondered how many people out there actually read these posts; not just follow but actually read them. Then the other day I actually ran into someone at a party who has been a regular reader of both my blogs and I felt like I ought to get back to it, even if it were for a small group of people.
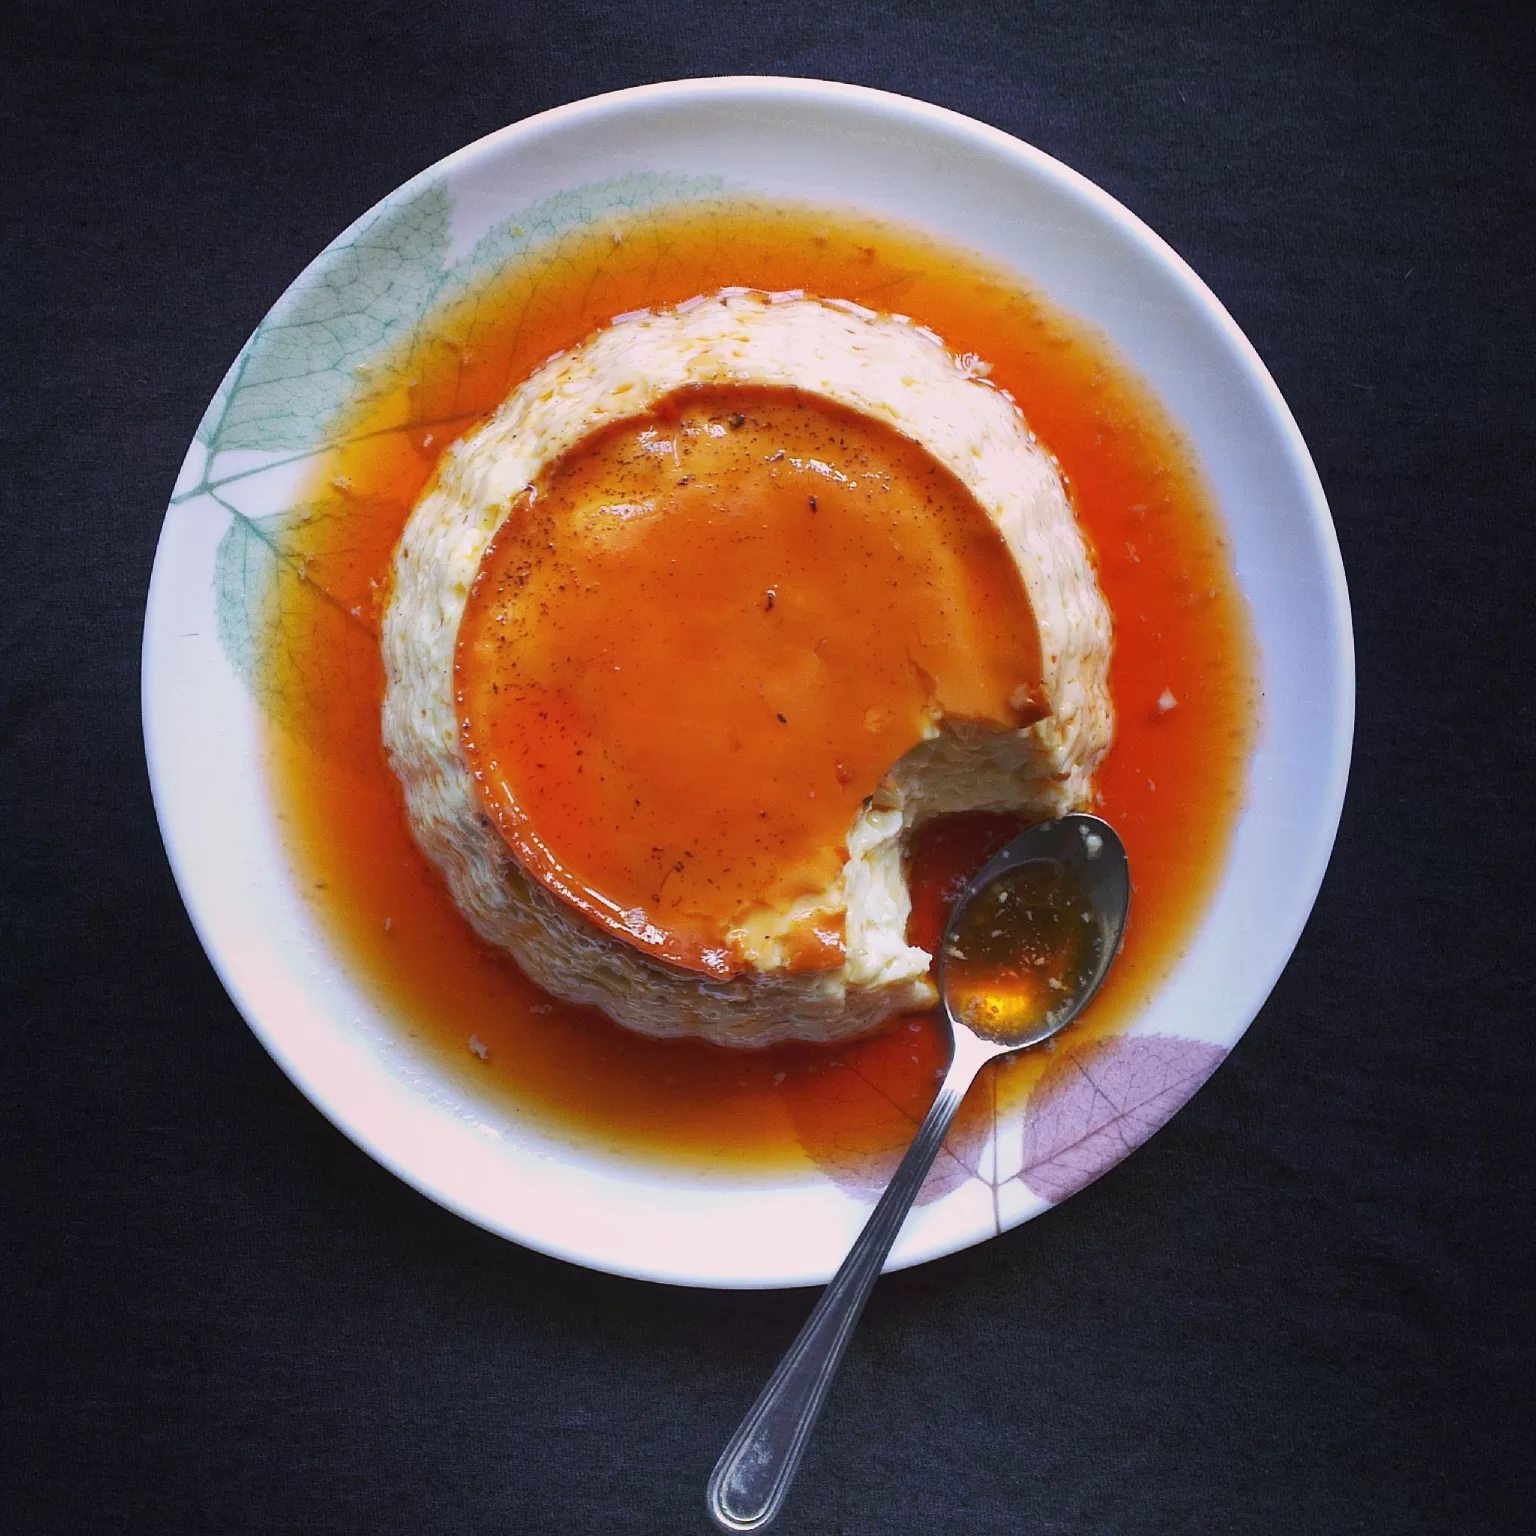
This is a post that goes back to my early days of oven-less dessert preparation, which means it is a good starter post for anyone taking their first steps with all things culinary. This also doesn’t call for any special equipment, other than a pressure cooker (which is usually a staple of any Indian kitchen). You don’t even need to use a fancy mould to set the custard in— I remember my mother using the same squat cylindrical tin that she used to cook dal in. It isn’t necessary to overturn and de-mould the thing either, since it can also be spooned into smaller serving vessels and served.
Pressure cooking is a slightly more violent process of cooking, relative to baking. Thanks to this, the consistency of the caramel custard is slightly uneven, with tiny air pockets within its body. If you want a more even texture, you could sit the mould in a tray of hot water (a little over the middle of the mould) and bake in an oven at around 160ºC-180ºC.
This recipe is also a great place to pick up the simple skill of making caramel. It took me an attempt or two to get it right, since I mistakenly assumed the process is to make a syrup first and then convert it to caramel. I kept adding water to make it more liquid, but this only ended up making the sugar crystallise more. All you need to do is patiently wait till the sugar melts and starts to bubble, soon after which you’ll see the first hints of golden brown appearing within the bits of the sugar right above the flame/element. Some folks recommend mixing the sugar with a spatula as it turns to caramel, but I’ve found this to be quite unnecessary, since you can achieve the same by just shaking the pan till the golden brown bits mix evenly into the rest of the liquid. You could also use brown sugar for making caramel— I suspect it’ll caramelise faster and might even yield a more refined caramel flavour.
You have to be very very careful while doing this, since the sugar/caramel is extremely hot and will stick molten to your skin like napalm if you spill it on yourself.
I prefer my caramel a little extra dark, on a sort of sweetbitter borderline (not bittersweet, which I think is more about bitterness than sweet). Keep an eye out for any white smoke, since it is a clear indicator of the fact that you might be fast approaching the burning point of your caramel. Take it off the flame and turn the flame down before putting it back (if it isn’t ready and completely even yet). Once caramel burns, it’ll smoke like a chimney and can not be reversed into any sort of edible form.
This recipe yields a perfect half litre’s worth of cremé caramel, so make sure you find a mould that has this capacity or more (ideally more, though de-moulding it might be harder, messier).
It’s quite difficult to mess this recipe up; the most complicated part of its assembly might be the preparation of the caramel, but it really doesn’t take that long to master. Pressure cooking the custard means you can’t burn it (unless you forget to put enough water in the pressure cooker) and doesn’t even take that long to cook (it takes around 15 minutes to assemble, so you could have this cooked and ready in half an hour, though you should let it chill and set in the fridge for at least an hour or two after it cools). The flavours are simple, with vanilla cream and a hint of nutmeg (be subtle and gentle with the amount of nutmeg you use; it is a potent spice, and a little goes a long way) and not very eggy at all, for those who have issues with eggy desserts. The volume of sugar and milk also ensures that this is not a wildly decadent and unhealthy dessert, so if you’re looking for a recipe to go back to the basics with, or for a forgiving, yet rewarding first step in dessert-making, this version definitely warrants and attempt this weekend.
This video is for a baked version of the same:
The Recipe
Ingredients
400ml full cream milk
50g sugar for the caramel
100g Sugar
2 eggs
½tsp vanilla extract
¼tsp Nutmeg
Method
- Butter a half litre mould and chill it in the fridge.
- Pour the 50g of sugar in a non-stick pan or heavy bottomed saucepan, add two tablespoons of water to this and heat on a high flame at first. As the sugar dissolves, forms syrup and starts to bubble, lower the heat.
- You’ll see the centre bit slowly turn golden and then a shade of brown. Keep shaking the pan to make sure the caramel forms evenly. Once the caramel turns a shade of reddish brown, pour into the buttered mould (it should sit at the bottom in an even layer) and set aside to cool.
- Boil the milk with 100g sugar and cool.
- Whisk the eggs with the vanilla and nutmeg. Add the milk to this mix slowly (the milk should be warm or cool, not hot) and whisk until even. Pour this into the buttered mould with the caramel. Pressure cook for around six whistles (15 minutes).
- Let this cool and then set in the fridge overnight. Let the mould sit in warm water for a bit before overturning in a plate to de-mould. Make sure your plate isn’t absolutely flat, as there will be some caramel water that will inevitably pool around the cremé caramel.



Awesome Anand! Even my mom used to make this years back. Btw did u put water in pressure cooker
Always..some pressure cookers tend to buckle at the base if it isn’t filled with enough water before cooking. If your mom made it, I’m sure you could too 🙂