I’ve been wanting to bake a ratatouille for a while now, and an opportunity presented itself last weekend. I’d decided to throw a small banquet on the occasion of my birthday, and had called a few friends over. Ratatouille was to be the first item on the menu— a super simple vegetarian starter.
The internet is rife with resources and recipes on how to make the ideal ratatouille (ChefSteps and Bruno Albouze both have great ratatouille videos), though in most cases they’re talking about what has become popularly regarded as one, and not the actual dish it used to represent. The real ratatouille differs in the fact that all the vegetable components are cooked individually, before being composed into a final dish. The more accurate name for this dish is a tian provençal. Tian also refers to the circular ceramic pot or dish that is used to prepare this.
The recipe listed below is not the traditional ratatouille, however, but the more popular version that the world has now grown used to. If one were to be accurate though, it would be only referred to as a Tian Provençal.
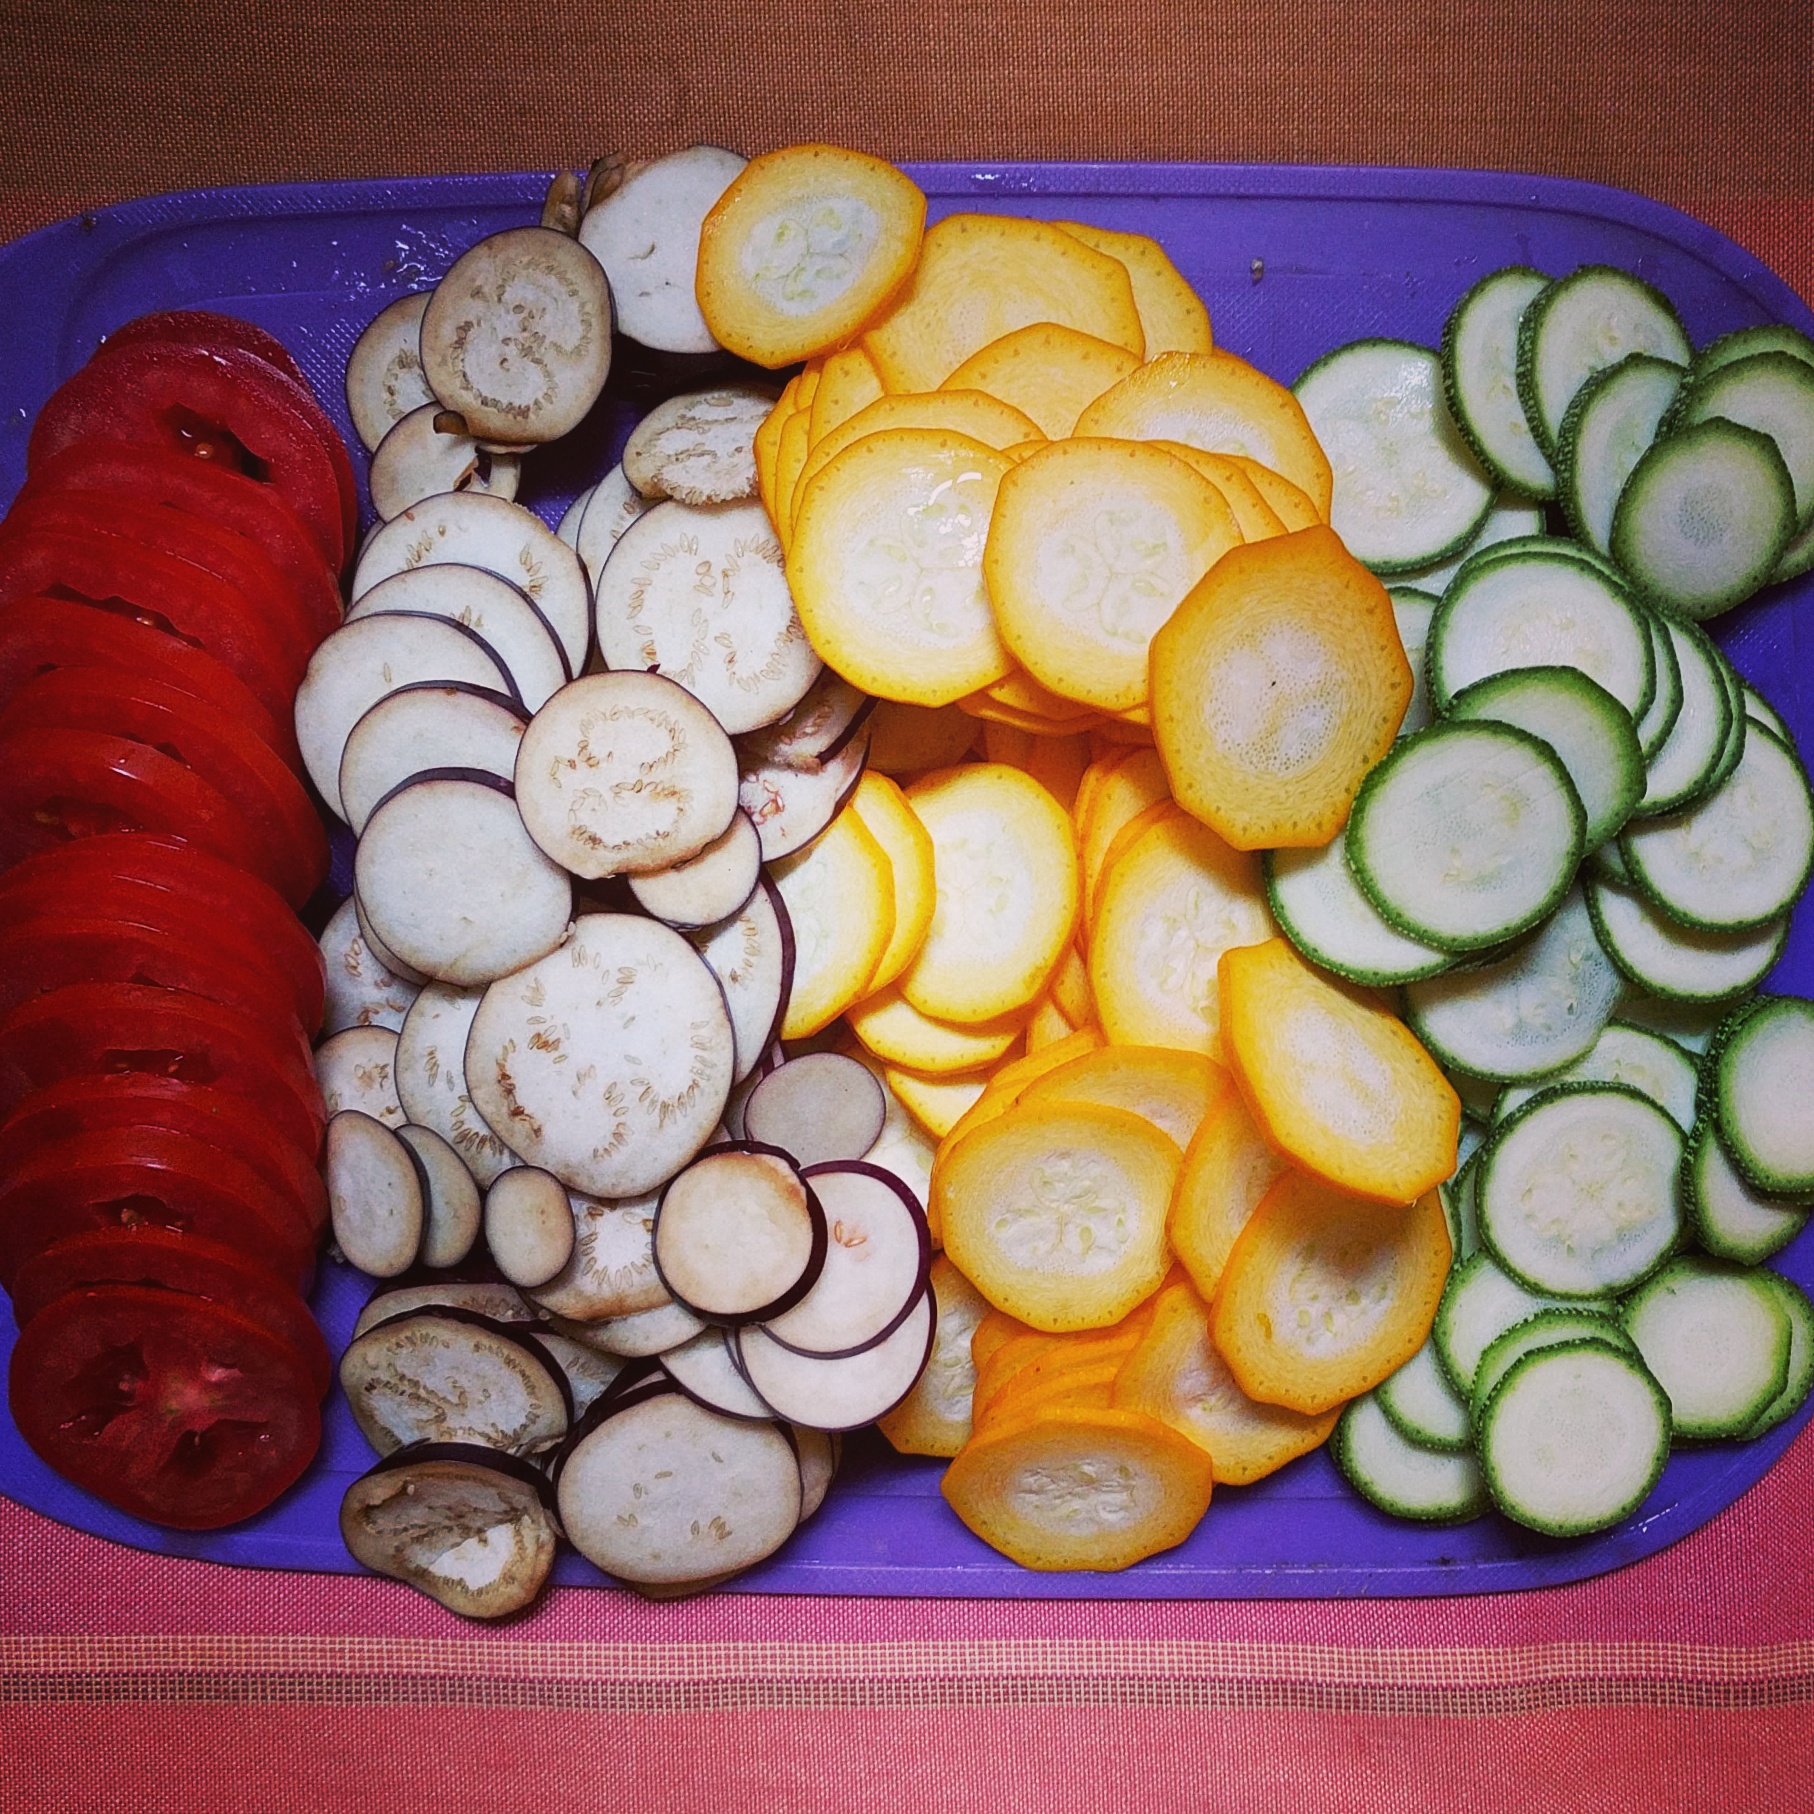
Sliced tomatoes, brinjal and zucchini.
One of my favourite things about this recipe is how it doesn’t waste a single element. The off bits of all the vegetables used in the slices (usually because they’re either too small or imperfectly shaped) can be chopped up and used in the sauce, adding to its flavour and nutrition and ensuring zero wastage.
The soul of the sauce is the smoky flavour of charred bell peppers. This is a technique I hadn’t used before, but was fun to attempt. You can also roast the bell peppers in an oven, but you won’t get the sort of char you would with an open flame.
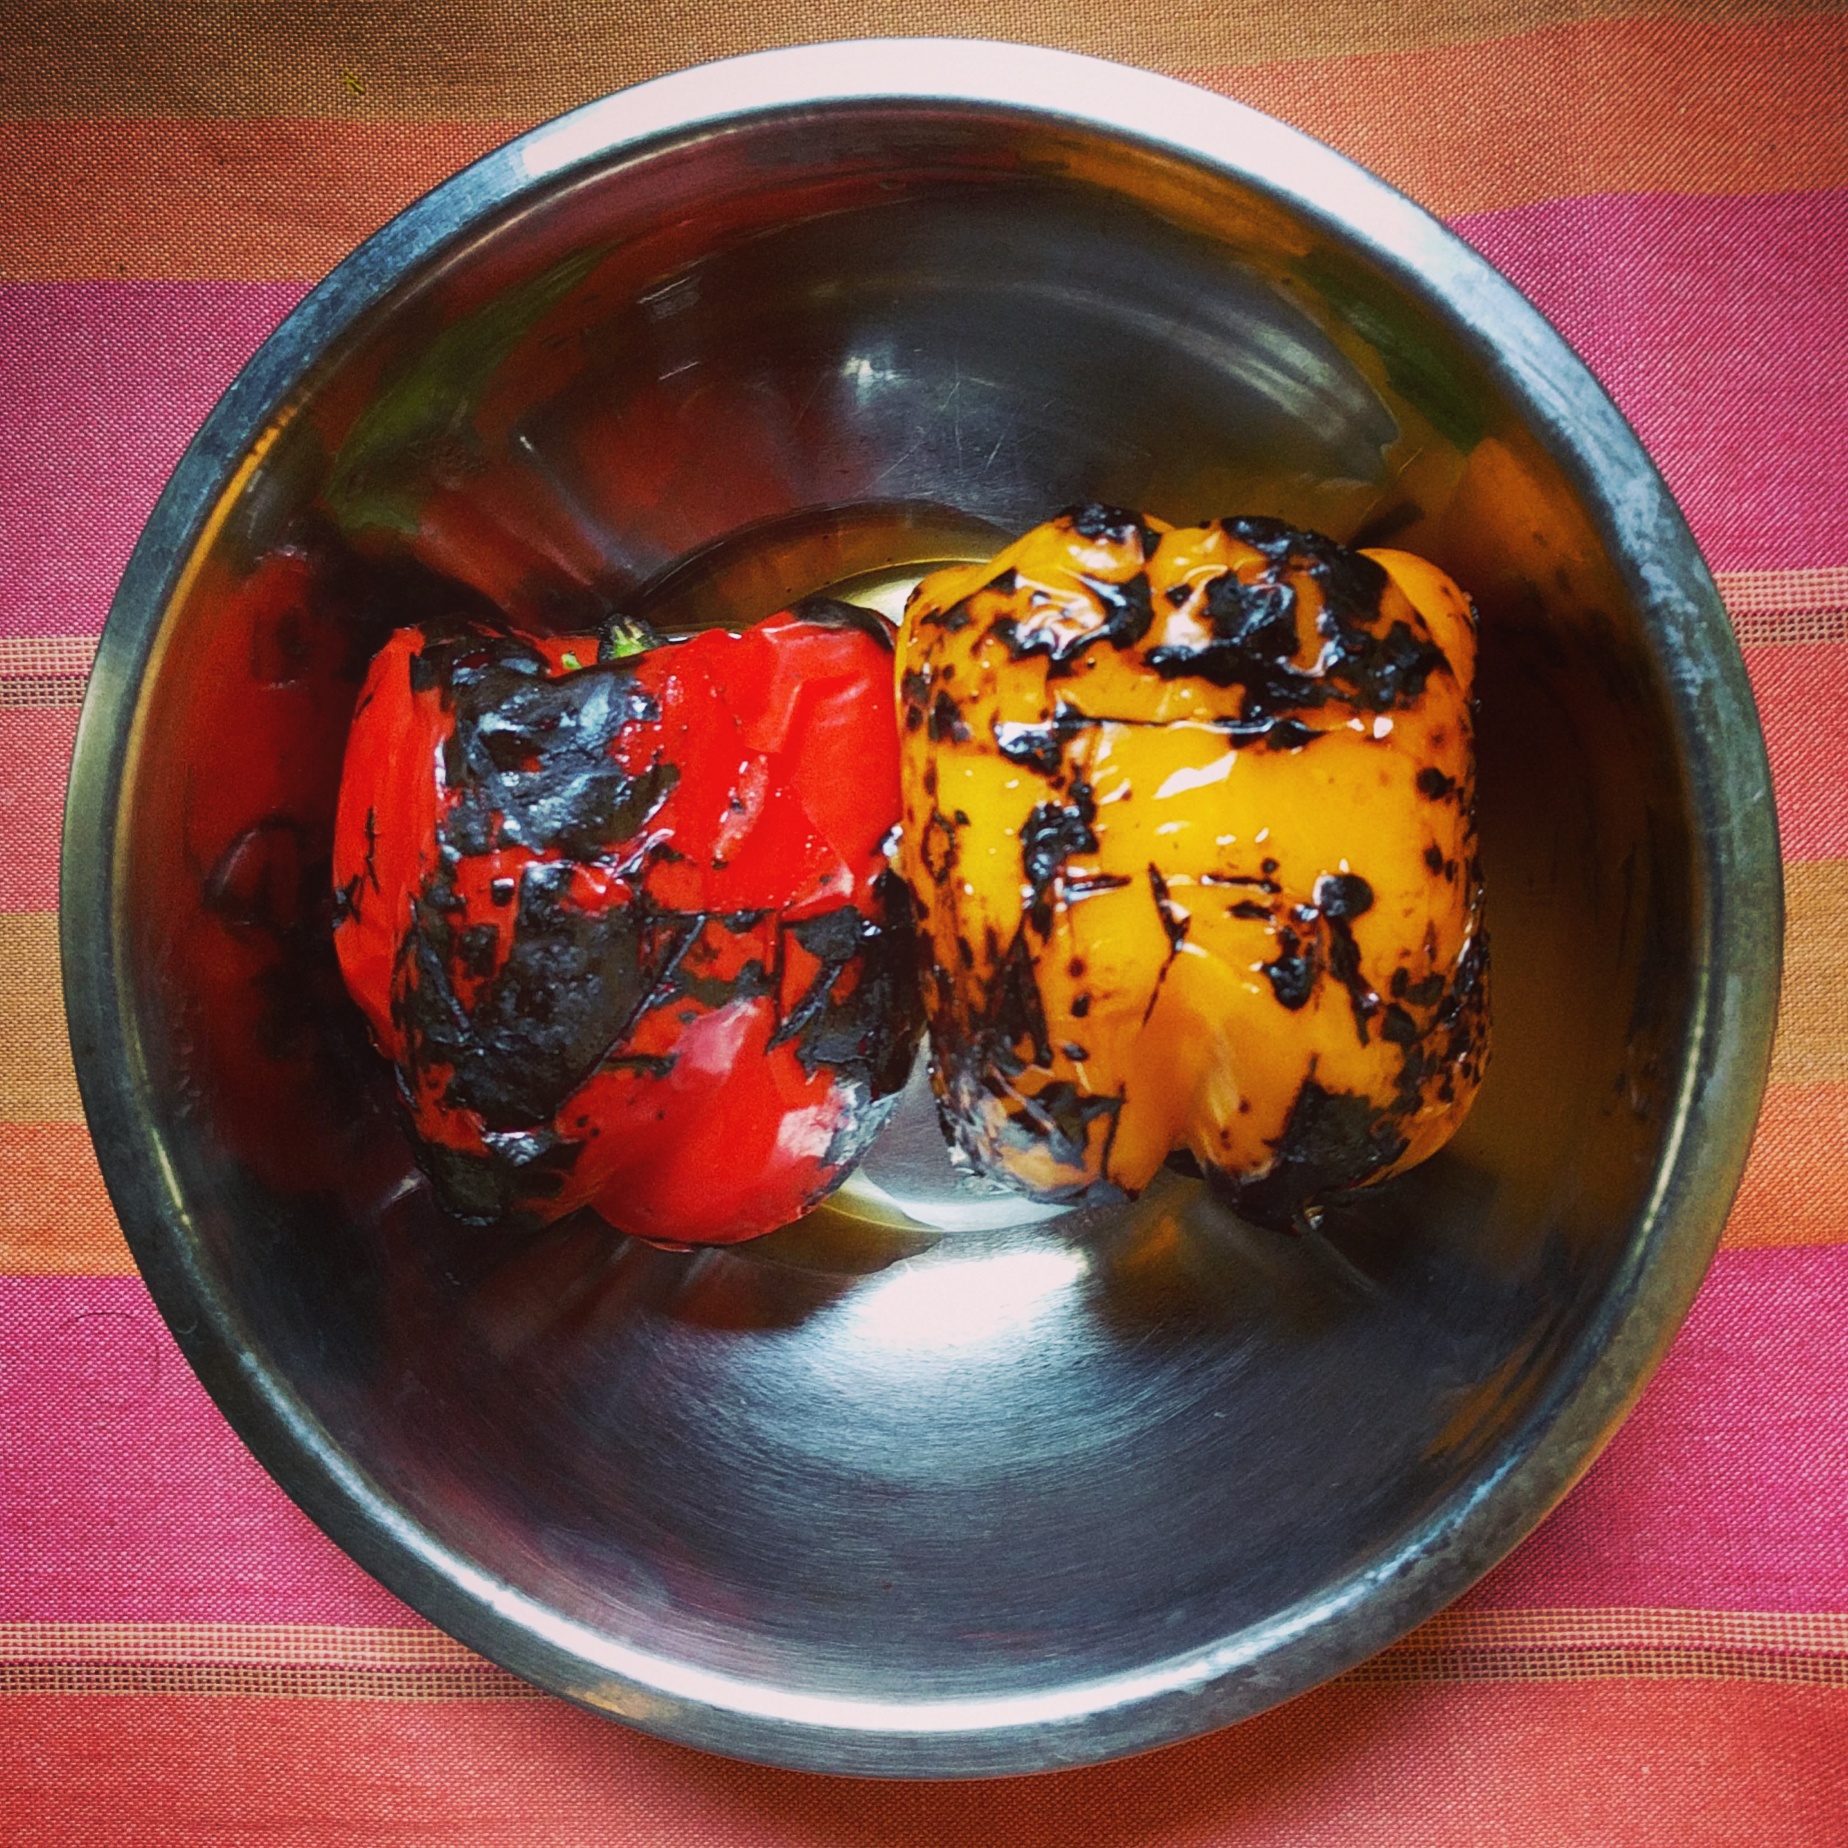
Gas flame charred bell peppers. I covered this bowl up with foil (you can use clingwrap if you have a larger bowl, where it won’t come into contact with the hot bell peppers).
The bell peppers (along with tomatoes) also give the sauce its lush orange-red colour. While the sauce plays the roll of a prominent bass note of flavour through each serving of this dish, it also acts as a buffer at the bottom, ensuring the vegetables don’t burn, while also sucking out the liquid and flavour from the vegetables and stewing them right back in their juices. You don’t need a very thick layer of sauce— a 1cm layer would be more than enough to be able to comfortably stack the vegetable slices over.
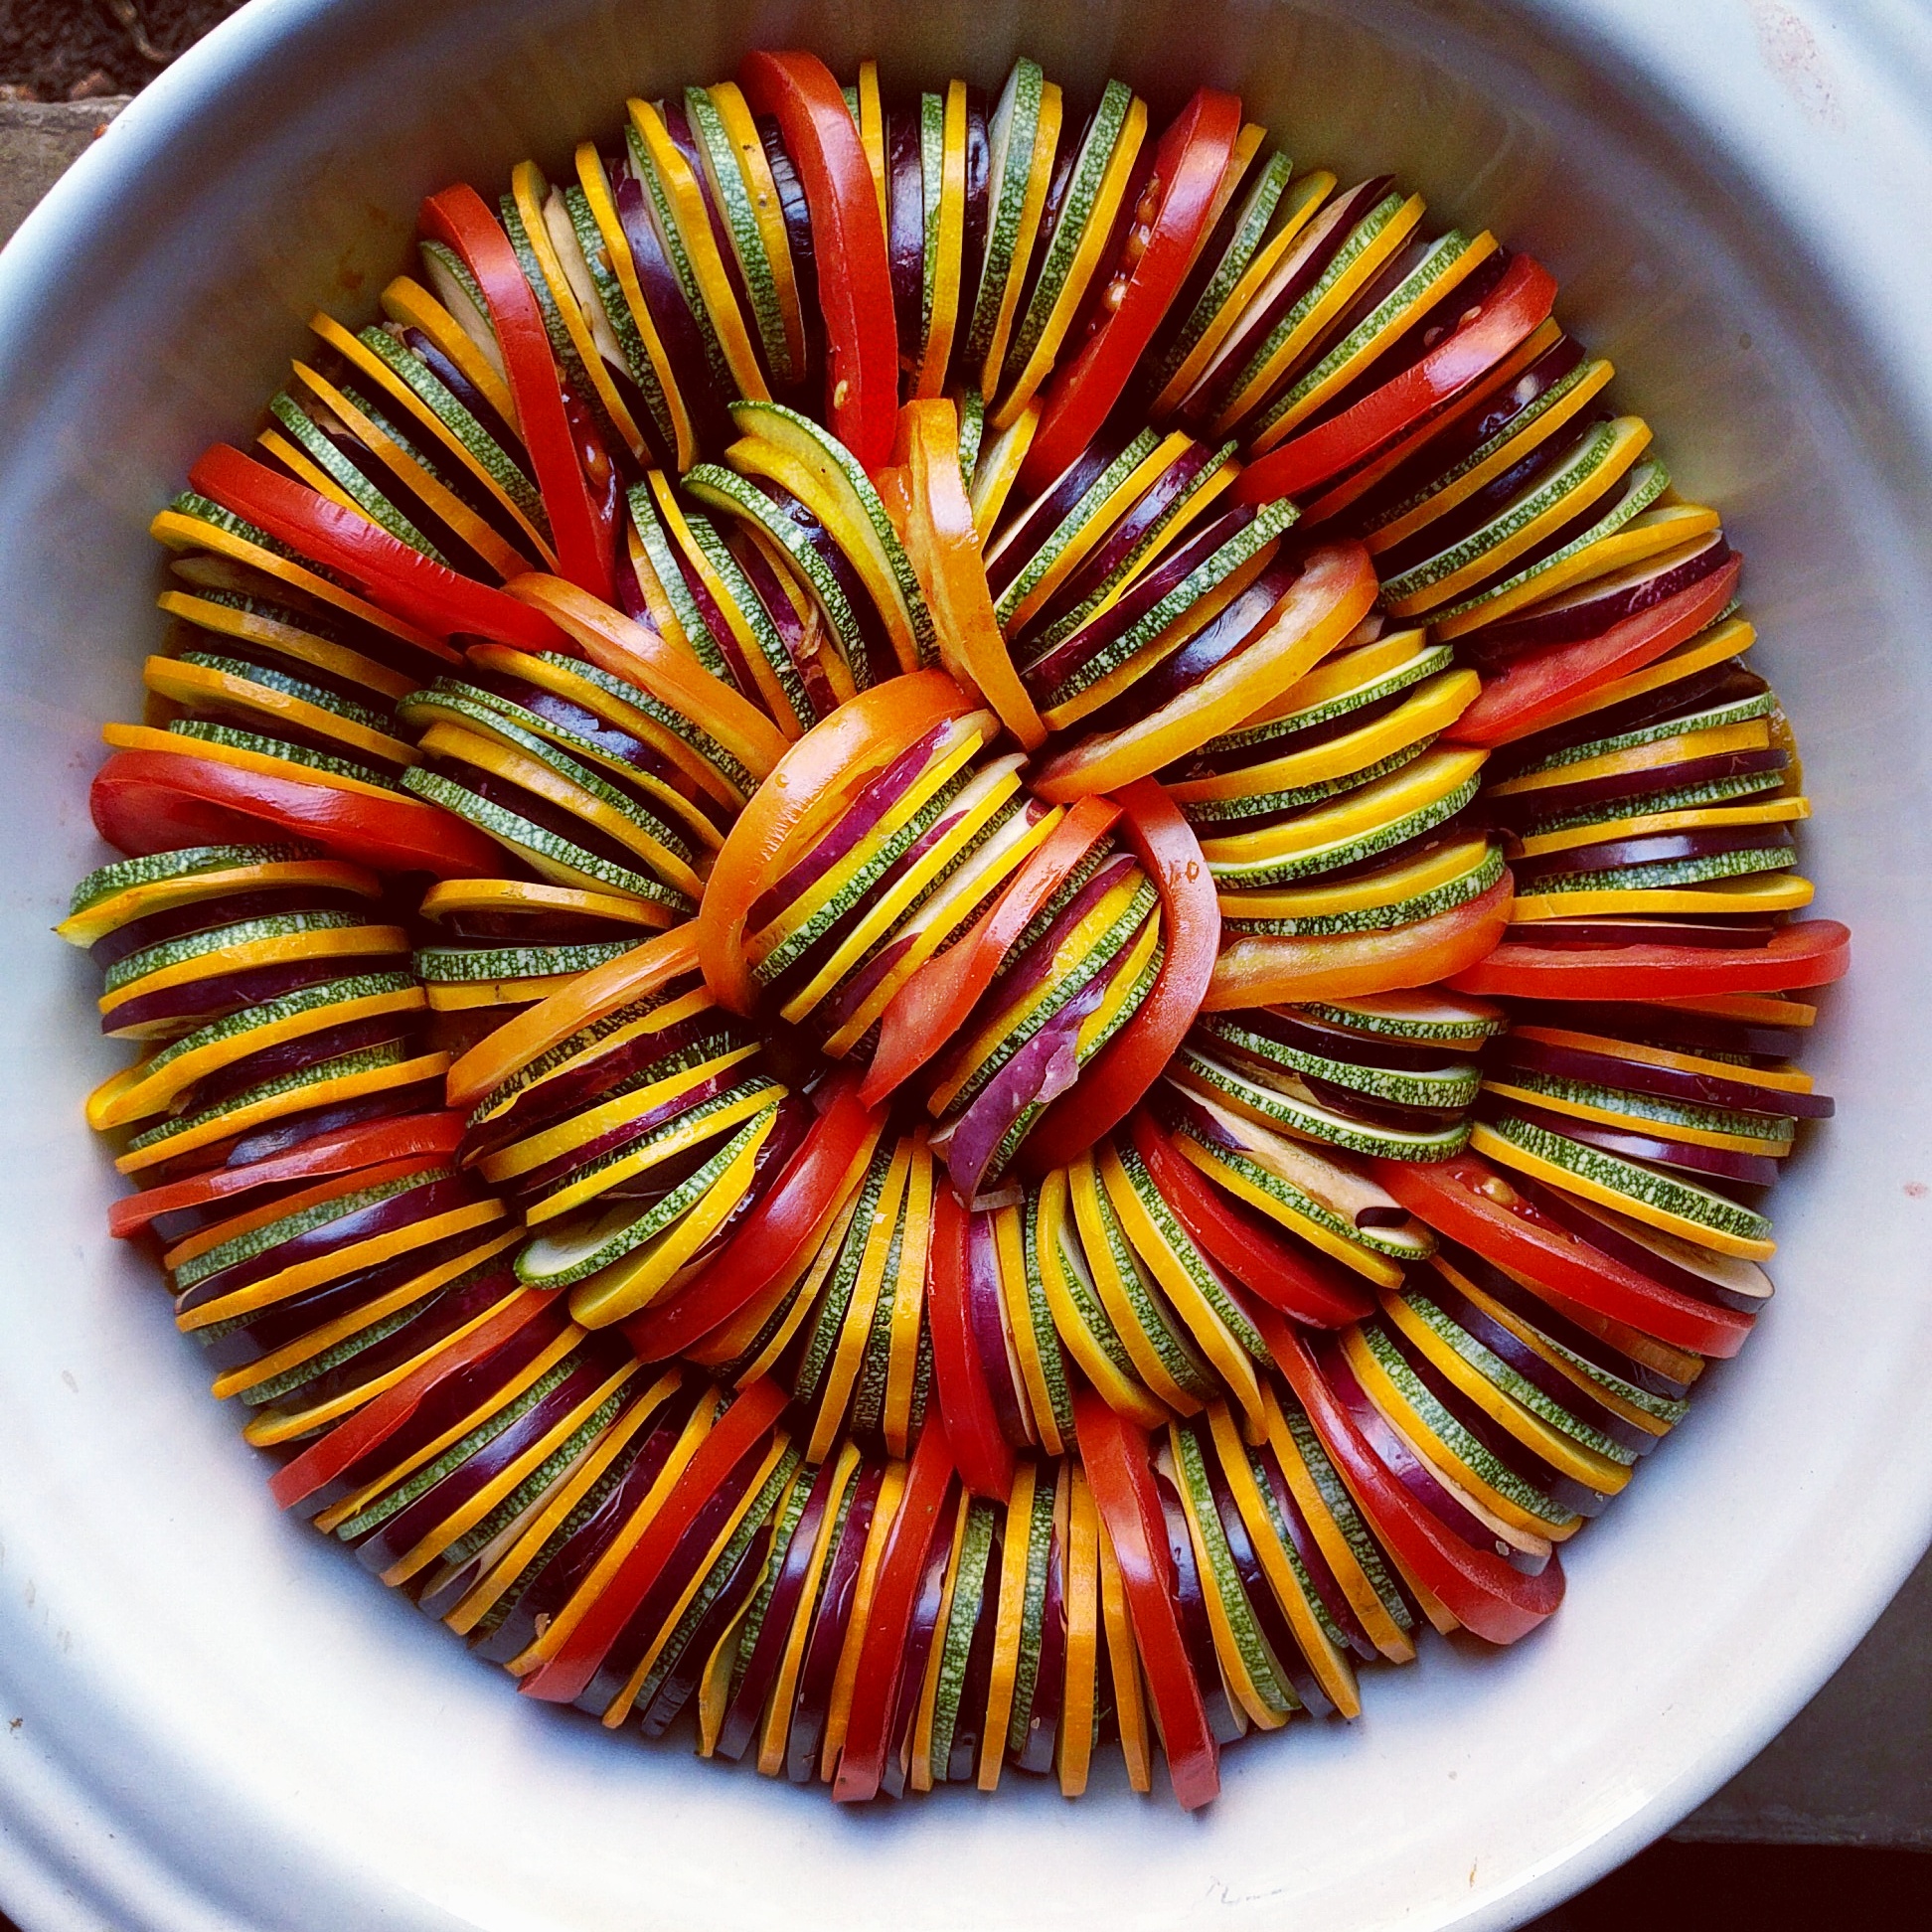
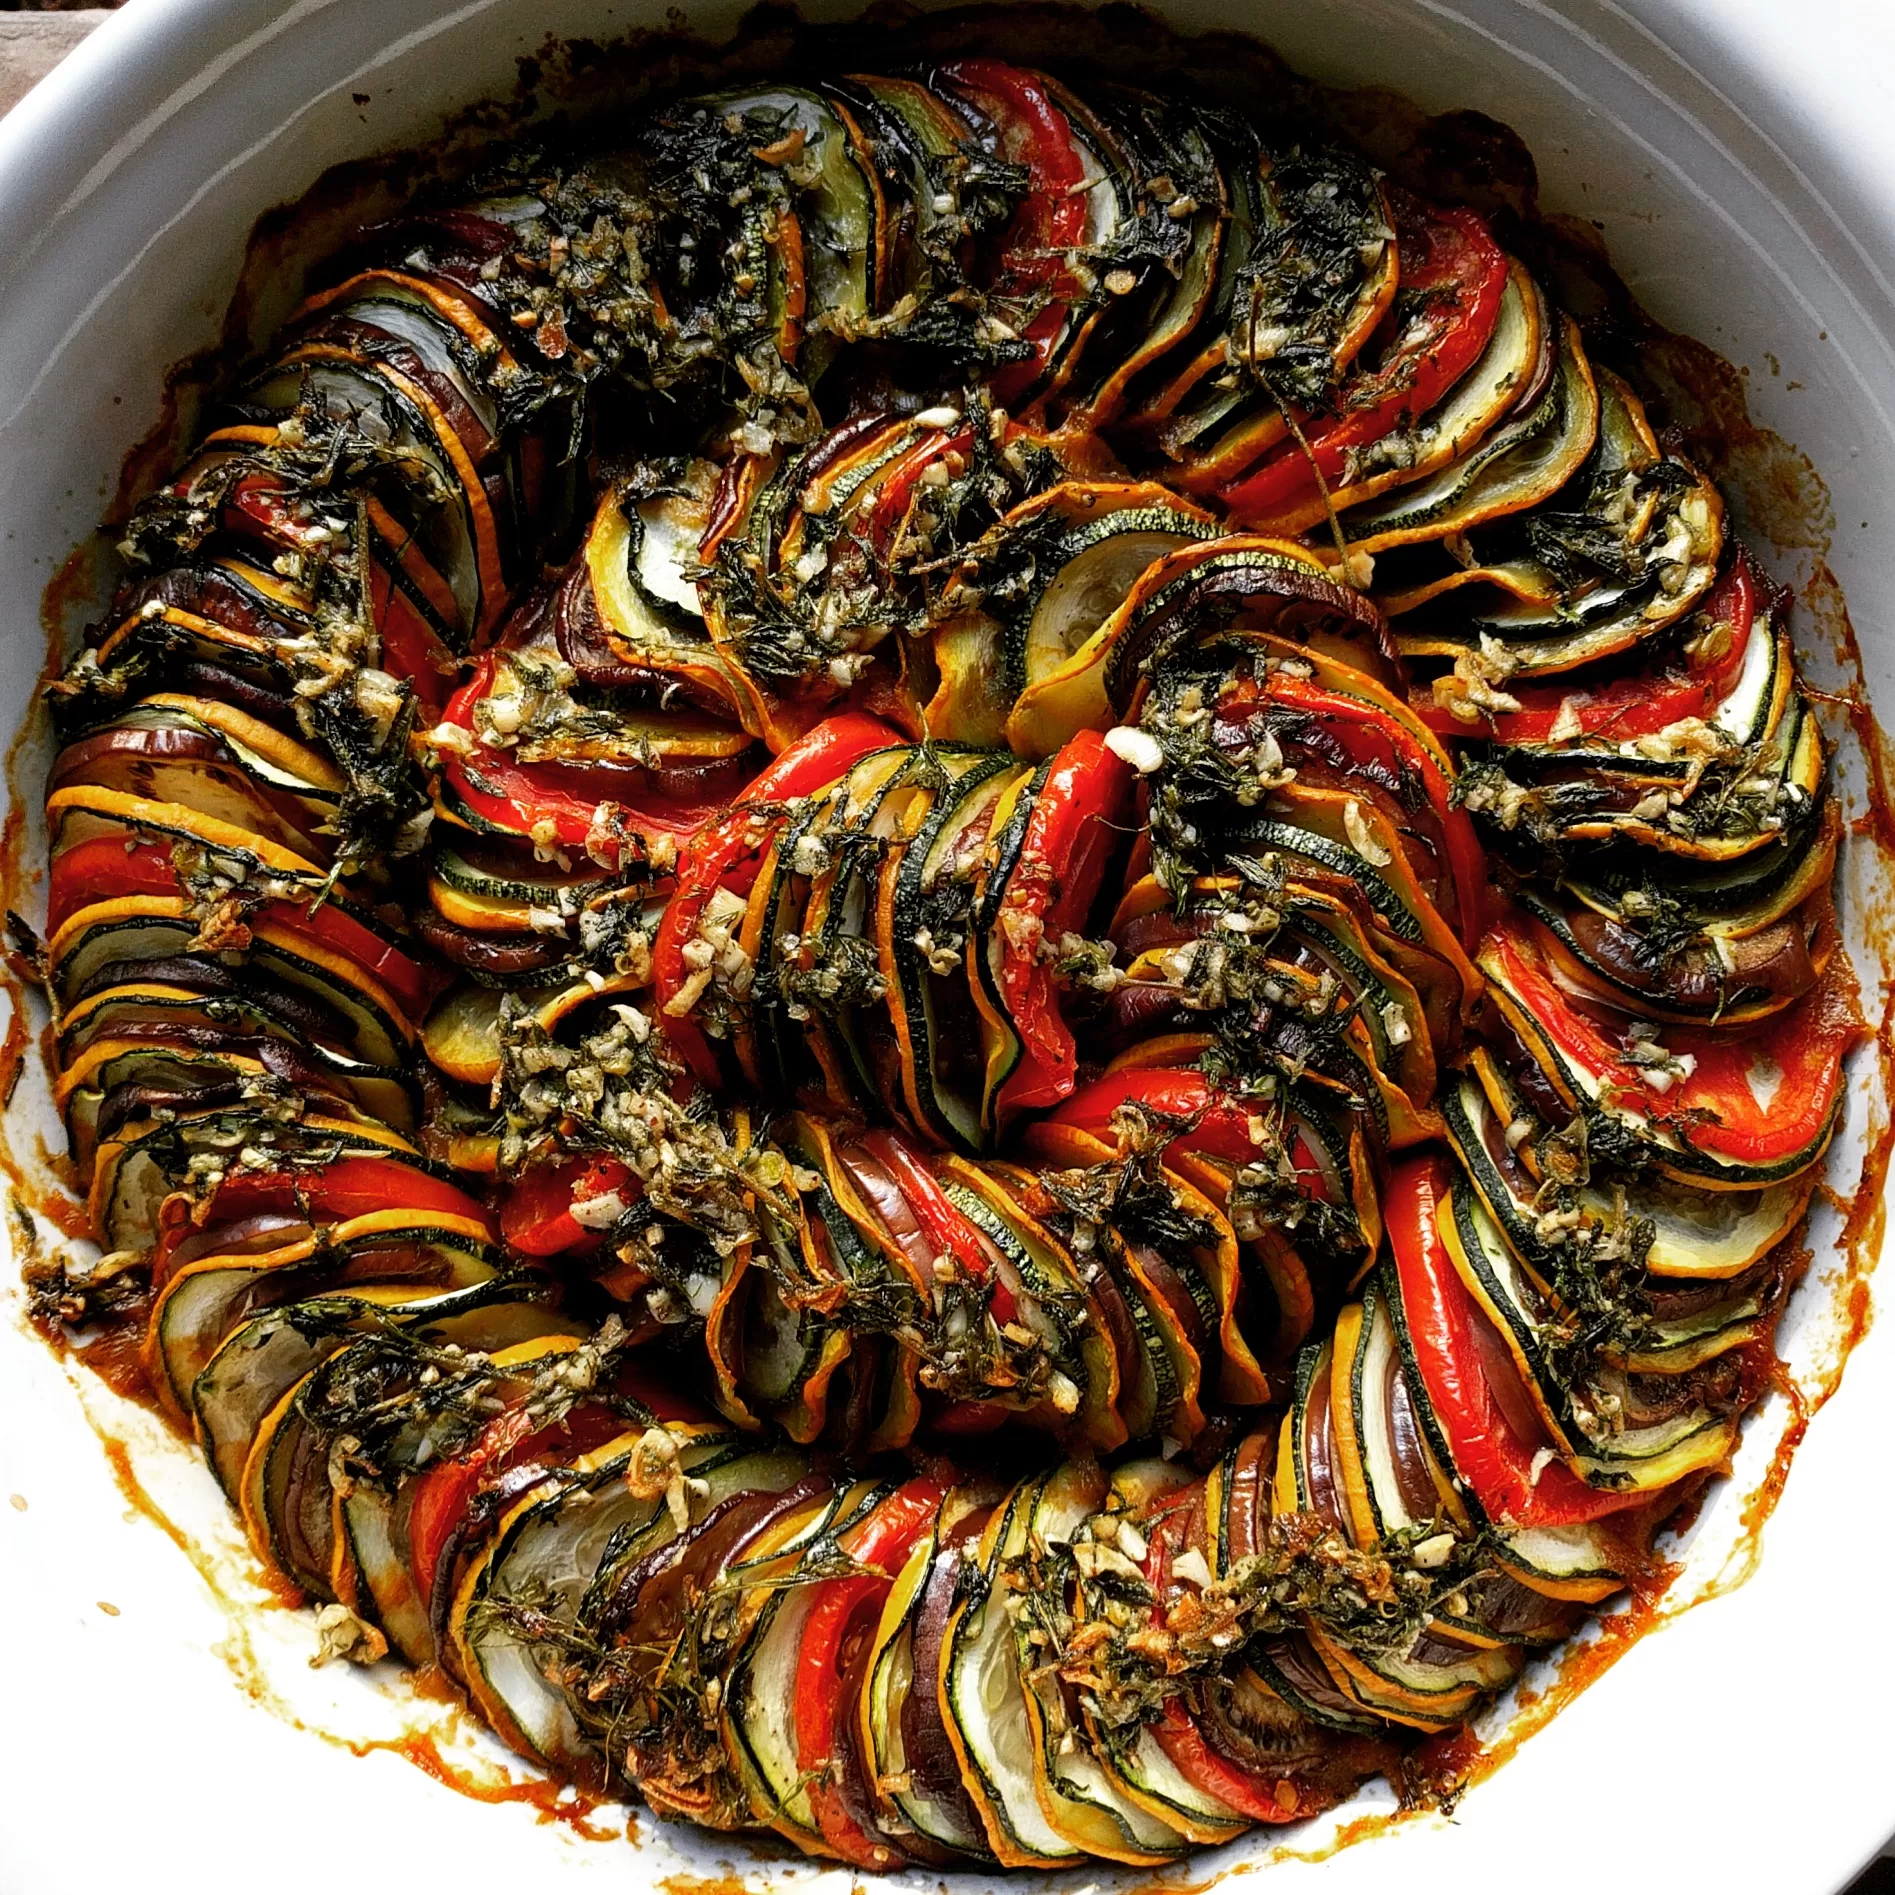
As you might expect, arranging and stacking the vegetable slices is the most fun part of the whole process of making a ratatouille. There’s an almost musical rhythm to the process. I followed the order of green zucchini-yellow zuchini-brinjal in four sets, at which point I punctuated it with a slice of tomato. So this was literally a ‘one-two-three, one-two-three, one-two-three, one-two-three — tomato’ rhythm, over and over again. Of course, being systematic and arranging your vegetable slices (in a bowl, or in order on a chopping board like I did) in order of assembly will speed the process up significantly.
The first time I composed the slices (the picture above), I stacked them all on edge, vertically. I found that it made more sense to let it lay a little bit to one side, reducing the vegetables indecision as to which side to fall towards as it bakes and softens. Making the slices lean in a particular direction (with the inner ring leaning in the opposite direction) yields a more ordered end result.
This might seem like a super tedious recipe, but it’s actually quite simple, and the flavour of the end result is totally worth the effort. It took me exactly fifteen minutes to slice and cut all the vegetables, thirty minutes to make the sauce, five minutes to blend it, and about half an hour to arrange the slices in order. If you’re preparing this with someone to help, your overall prep time would reduce significantly.
Ratatouille is one of those dishes that quite suddenly became a ubiquitous part of popular culture, but didn’t make its way into too many Indian kitchens (possibly because of how French and unattainable it sounds). It’s a deceptively simple dish with a very satisfying outcome, and I would definitely recommend giving it a shot at least once (which I’m sure will make you want to make it again) in the near future.
The Recipe
Ingredients
1 large onion
2 celery stalks
2 carrots
Garlic
Fresh Basil.
1 large red bell pepper
1 large yellow bell pepper
2 large and very red tomatoes
3 smaller tomatoes
1 large green zucchini
1 large yellow zucchii
1 large Japanese brinjal
Or, five tiny brinjals
Olive oil
Salt & Pepper
Dill (optional)
Herbes de Provence (optional)
Thyme
Parsley
Method
- Carefully roast the bell peppers over a gas flame till evenly charred. Transfer into a bowl and cling-wrap it. Leave this to steam for around 30 minutes. This will make the skin loose and easier to peel.
- Roughly chop the onion, celery and carrots (this is your standard mirepoix) and sauté with olive oil and a little butter (leave this out for a completely vegan version) for around ten minutes in a saucepan.
- Add a tablespoon of chopped garlic.
- Peel and chop up the bell peppers, after carefully removing the seeds and internal ribs, and add to the saucepan.
- Meanwhile, using a mandoline (or very sharp knife) slice the zucchini and brinjal into neat slices around 2mm thick.
- Slice the smaller tomatoes into 3mm slices (a little thicker than the zucchini and brinjal).
- Chop up the off bits of the zucchini, brinjal and tomato and chuck it into the saucepan with the mirepoix and bell peppers.
- Make little X-cuts on the bottom of the large red tomatoes and blanch in boiling water for 40 seconds. This will make it easy to peel. Remove the skin and chop up roughly.*
- Add the tomatoes to the saucepan, season with salt, pepper, herbes de provence and about a teaspoon of thyme leaves and cook for around 20 minutes, or until the vegetables look cooked and jammy.
- Transfer the vegetables into a blender (a hand blender also works, but is a little more tedious to purée with) with around five or six large leaves of basil and blend into a purée.
- Pour the puréed sauce into the bottom of a circular ceramic (glass would also work) baking dish and spread evenly. Don’t use all the sauce; just use enough to coat the base in an even 1cm thick layer (max).
- Start gathering the green zucchini, yellow zucchini in brinjal in groups to make a set of four (in total, twelve slices of zucchini, and brinjal). Add a slice of tomato and carefully lay this on edge or resting towards one side in the pan (refer to the picture above).
- Compose the entire dish with slices of vegetable and tomato carefully till evenly covered, without any gaps.
- Make a seasoning by chopping up a teaspoon of fresh tyme, a teaspoon of fresh dill, two teaspoons of garlic with around four tablespoons of olive oil, with salt and pepper to taste. Stir well to distribute the salt, pepper and garlic evenly through the oil.
- Using a tablespoon, evenly drizzle this seasoning along the rows of vegetables, making sure that all the rows get an even cover of seasoning.
- Cover this with a layer of foil and bake in the oven for an hour and a half at 150ºC. Remove the foil and cook for another 15 minutes.
- You can remove this from the oven at the end of the first hour and a half (without removing the foil) and store it in the fridge (after completely cooled). Whenever you’re ready to serve, let take it out of the fridge and let it sit until it comes to room temperature, and then put it back in the oven and bake for around 20-30 minutes at 150ºC.
- Drizzle some chopped parsley over the ratatouille and serve. Make sure to dig deep under and get enough sauce along with each serving.