

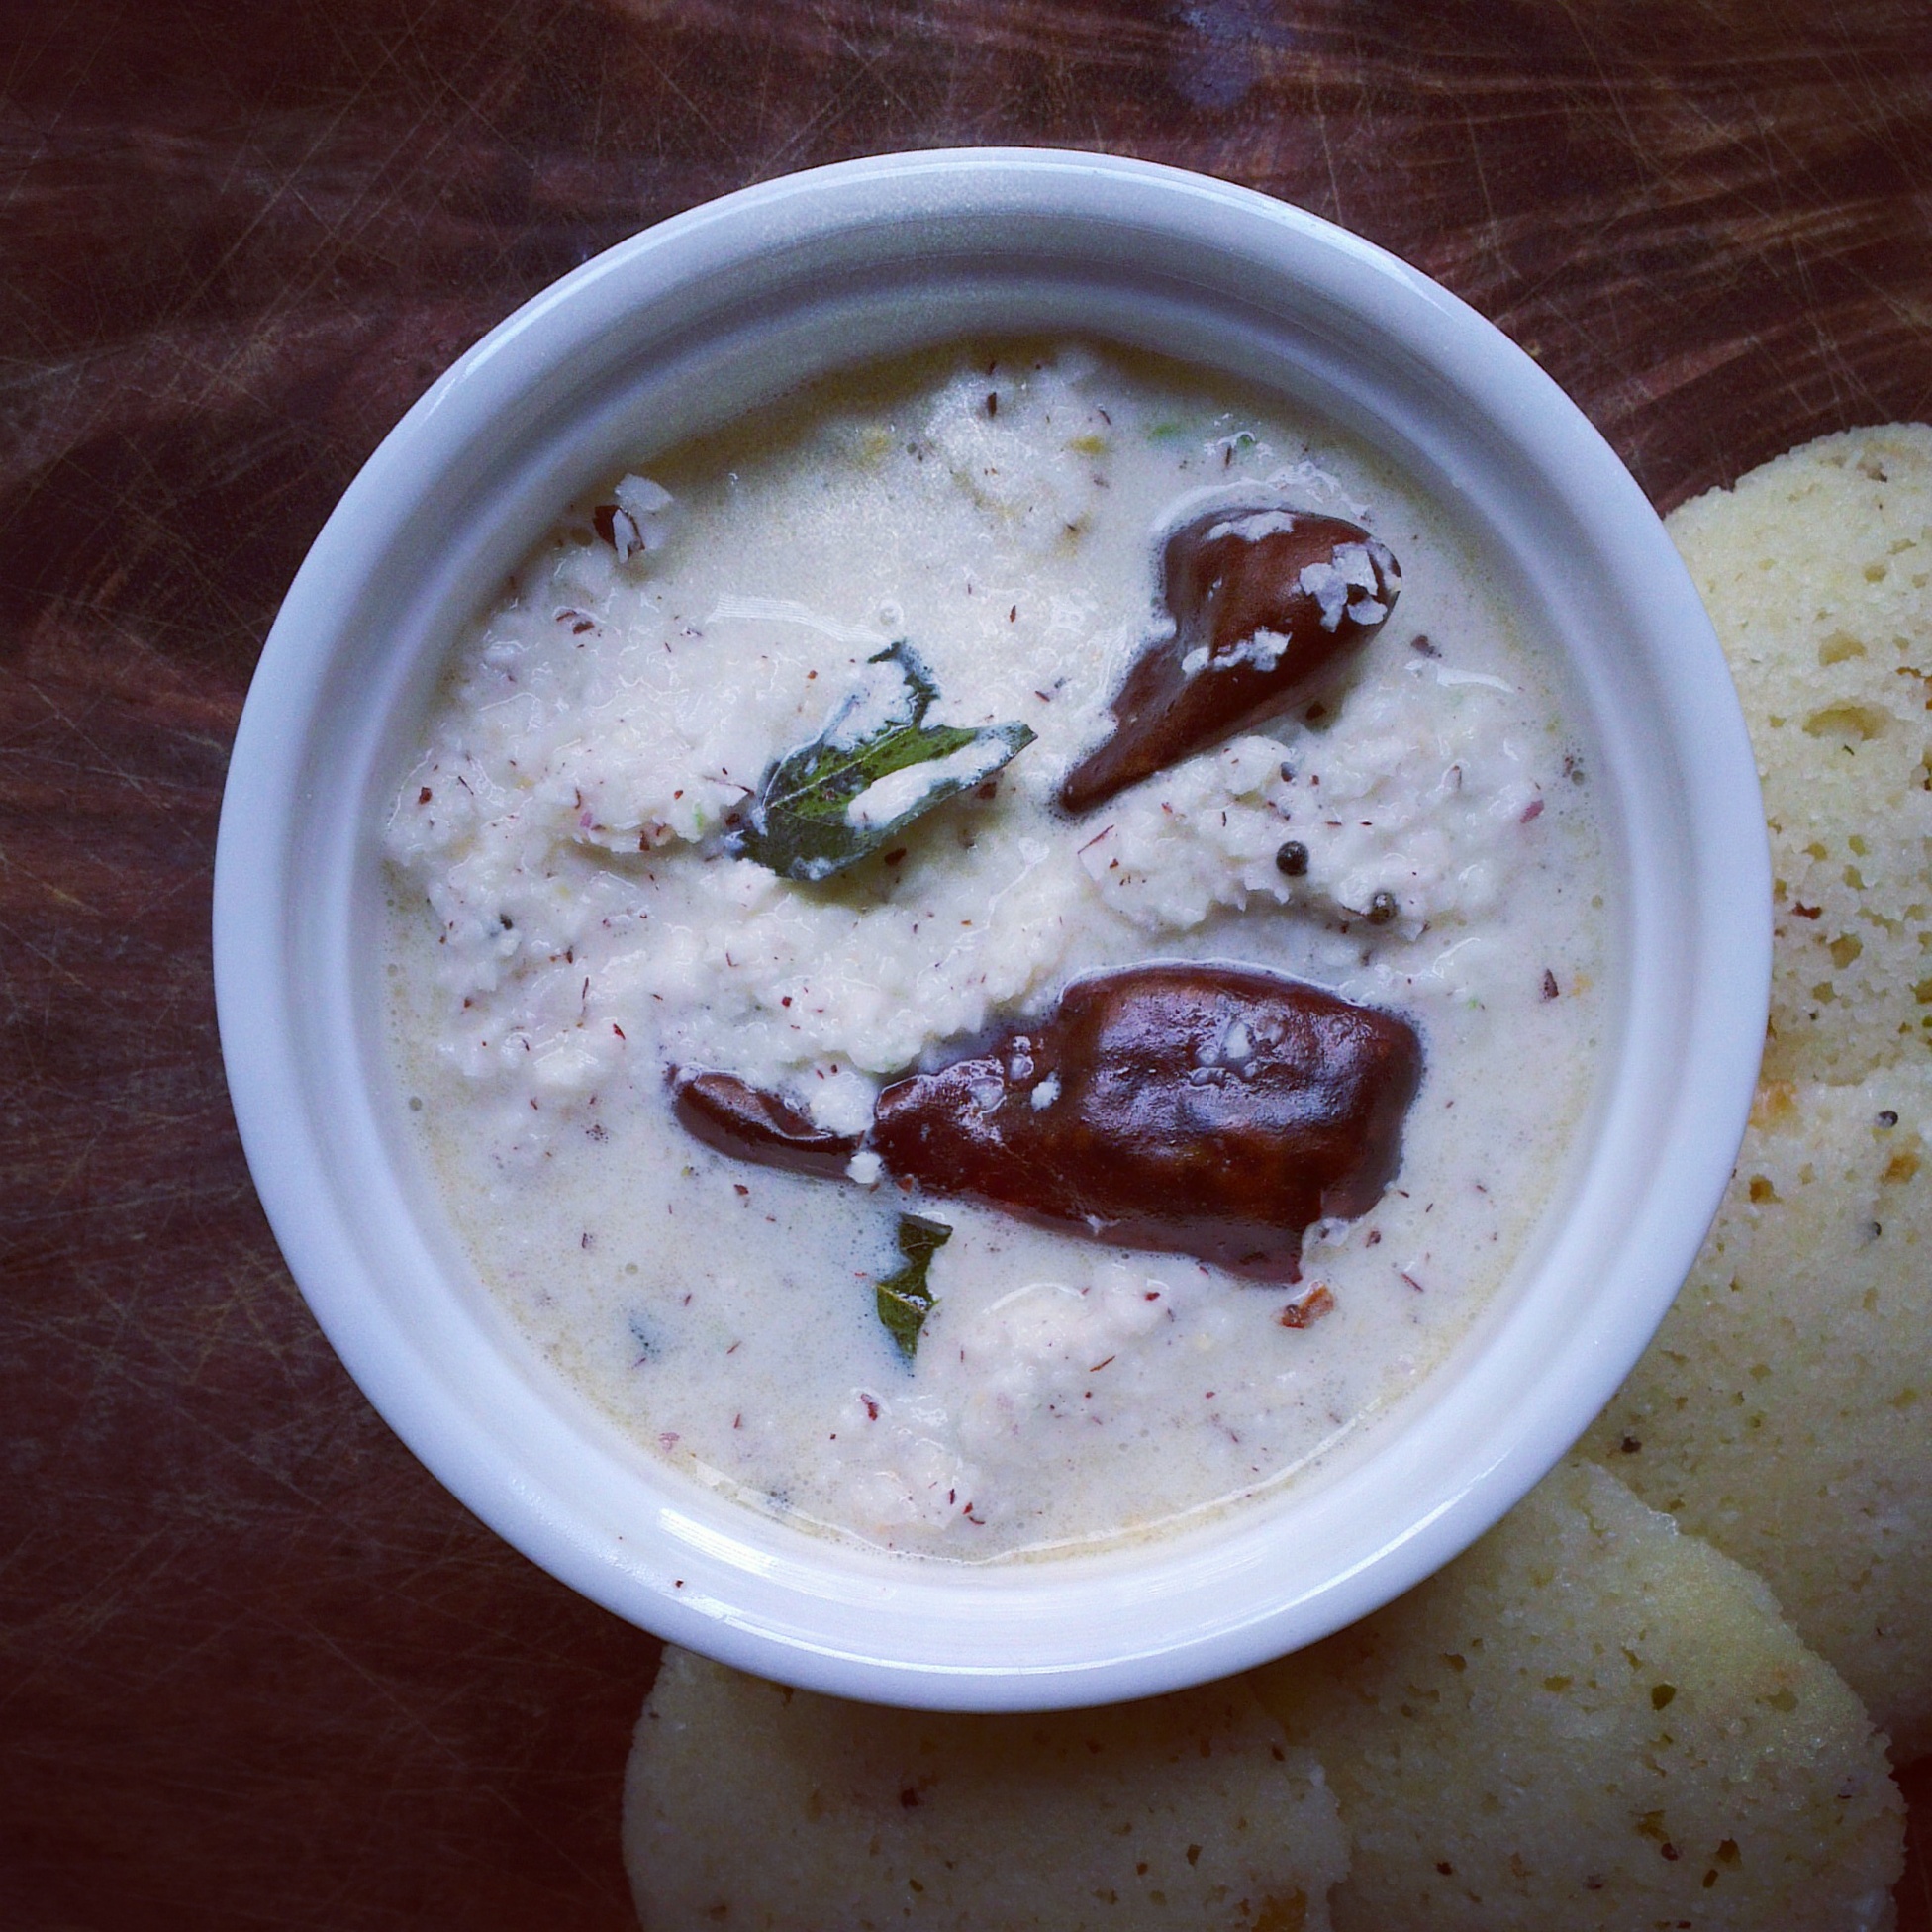
Today is Onam. Though I’m not cooking up a hardcore Onam lunch, designed to knock the persons experiencing it into a food coma, I decided to make something that to me is symbolic of Kerala, and home (even though it might not be necessarily part of an Onam lunch). Coconut chutney is the ubiquitous component of almost every south Indian breakfast, whether it be served with idlis, dosas or even poha (they used to do this at the college canteen at CEPT, it was an oddly fantastic combination).
Coconut chutney, or the authentic preparation of it is something that nearly every south Indian person would have an opinion about. Different places make it differently with varied components. The recipe I’ve listed below is one that is most familiar to me— the way it was made at home.
As a child (and to a certain extent even now) I used to be extremely fussy about the presence of coconut chutney along with my idli or dosa breakfast. I preferred it over sambar, so would only eat idlis and dosas if there was coconut chutney along with it.
Most of the recipes here on Magic Marinade insist on accuracy and method and a refined final product, but this is one that does the opposite. Traditionally, coconut chutney was made by crushing grated coconut on a heavy granite grinding stone. This made for a very particular texture of chutney, where the coconut wasn’t pulverised to the point of becoming a paste.
Contemporary chutneys are made in blenders, since few households have those massively heavy grinding stones any more. If you’re not too careful with hand blender, it’s easy to turn the coconut into paste, making it more liable to split.
The usual process is to grate the coconut using a floor or counter-mounted grater, which is then pulverised in a grinder or blender. I use a different method, where I cut the kernel out in arcs and rings using a butter knife. I’ve always been a big fan of coconuts ever since I was a kid; I used to cut slices out and eat them, sometimes finishing entire halves at a time. This has made me quite adept at removing the kernel from coconuts quite easily, but I’m sure it is something you can also figure out fairly easily. It’ll also reduce the chances of counter-mounted coconut grater induced carpal tunnel.
I then chop the coconut up (like in the picture below) and use this in conjunction with a hand blender to get the right texture of chutney. The trick is to work the coconut in short pulses of the hand blender, cutting down all the pieces to a smaller size without turning into a fine paste.
Shallots serve as another important component of the preparation, as they add a subtle sweetness to the chutney and also show up in little crunches (if you blitz with care) while you’re eating. Sometimes, if the sweetness of the water isn’t enough (or like me, you drink the water up before you can use it), a little bit of jaggery, sugar or honey helps with the sweetness.
Since the quality of coconut is extremely important (and there are few things more disappointing than cracking a coconut open and finding it to be bad or dry), so the paragraph below explains how I make my coconut selections.
How to choose your coconut
First, a visual inspection (without picking it up)— look for a coconut with a shell clear of nicks or cracks, suspicious wetness or strange discolourations. Mentally, assign a weight to the coconut, according to its size and shape. Pick the coconut up; if it weighs lighter choose another. If it weighs the same or more (which is the best), give it a shake, and you should hear a good amount of water sloshing about inside.
Usually coconuts that dry out or have leaked due to a perforation or crack tend to leak and also go bad faster. Coconuts are amongst nature’s most well packaged devices, and can last for a couple of weeks in the pantry, after which it’ll slowly start to ferment (not always in a good way).
Some people tap the coconut while checking it. I’m not sure what the tapper learns from this, other than that the coconut is extremely hard, which isn’t exactly new information to the tapper. However, hitting it with a hard object, or against a wall would let you hear whether it sounds hollow (which cracked or damaged coconuts tend to sound like) or solid (healthy coconuts). I wouldn’t recommend this method, as it isn’t going to win you the favour of your supermarket folks or vendors.
I use a steel mortar (from a now derelict mortar and pestle) to crack open my coconuts, prying it open with a wide blade knife. I have also cracked it open against the corner of the kitchen counter, though this is harder to control and might do damage to property. At home coconuts are always neatly and expertly cracked open using a steel machete, which serves the dual purpose of cracking the shell and then gently prying it open using its curved tip.

The Recipe
Ingredients
1 coconut
½ thumb of ginger
2 green chillies
2tbsp split roasted gram
Handful of shallots (approx 40g)
1tsp jaggery/sugar/honey
4 heaping tbsp dahi (yoghurt)
2-3tbsp cooking oil
1tsp black mustard seeds
1 sprig curry leaves
2 dried red chillies
1 pinch asafoetida
Method
- Break the coconut and reserve the water. Using a butterknife cut the kernel out and chop into little pieces (ref. picture above).
- Roughly chop up the chillies and ginger.
- In a ceramic, metal or glass bowl, add the coconut and its water (use regular water if your coconut doesn’t have enough) along with the split roasted gram and sugar, and give it a quick blitz with your hand blender till there aren’t any large chunks of coconut left.
- Add the chillies next and blitz.
- Add the shallots, two at a time and pulse; you don’t want to pulverise the shallots.
- Mix in the yoghurt (add more if the consistency seems too dry).
- Heat the oil in a small frying pan (you get really tiny saucepans (about 4″∅), that are meant just for tempering) and add the mustard. Wait till they all crack and splutter.
- Working quickly, add the red chillies, curry leaves and asafoetida, making sure none of these burn in the hot oil.
- Pour this into the coconut chutney and stir— watch out, it’ll sizzle and spit. Take a tablespoon of the coconut chutney and pour it into the pan, washing out any remaining oil and mustard into the bowl. Again, do this carefully as the cool chutney will sizzle quite a bit when it hits the hot pan.
- Let this sit for about ten minutes before serving.


even more kerala than the mathi!
Haha, speaking of mathi, I’m planning out a bunch of fish recipes this year, since I’ve only dabbled in fish curries and things in a limited way so far.